Showing posts with label Mobile Tricks. Show all posts

Tuesday, 26 July 2016

// // Leave a Comment

Safety tips to follow while using WhatsApp

  • Never send private information like bank account details, PINs or passwords through WhatsApp.
  • Never accept files or begin downloads from messages sent to you by strangers or unknown numbers.
  • Never respond to suspicious messages that come through from unknown numbers.
  • WhatsApp as a service will never contact you through a WhatsApp message.
  • Never trust any message that claims to come from WhatsApp and demands some payment for the service.
  • Some scams say they can connect your PC with WhatsApp and send messages from a desktop. Do not believe these as this is not possible.
  • Keep automatic downloads disabled so that you can always keep a check on what is being downloaded.
  • Avoid using WhatsApp when you are connected to open Wi-Fi networks. These are hunting grounds for malware authors and data sniffers.
  • Always keep an updated antivirus security solution installed and updated on your mobile device.
  • Lock WhatsApp with Secure Password.
  • Remember to log out of WhatsApp Web.
  • Always use WhatsApp Privacy options carefully.
Read More
// // Leave a Comment

How To Boot Block Recovery For Free.

 
AWARD Boot-block recovery:
That shorting trick should work if the boot block code is not corrupted, and it should not be if /sb switch is used when flashing the bios (instead of /wb switch).

The 2 pins to short to force a checksum error varies from chip to chip. But these are usually the highest-numbered address pins (A10 and above).

These are the pins used by the system to read the System BIOS (original.bin for award v6), calculate the ROM checksum and see if it’s valid before decompressing it into memory, and subsequently allow Bootblock POST to pass control over to the System BIOS.

You just have to fool the system into believing that the System BIOS is corrupt. This you do by giving your system a hard time reading the System BIOS by shorting the 2 high address pins. And when it could not read the System BIOS properly, ROM Checksum Error is detected “so to speak” and Bootblock recovery is activated.

Sometimes, any combination of the high address pins won’t work to force a checksum error in some chips, like my Winbond W49F002U. But shorting the #WE pin with the highest-numbered address pin (A17) worked for this chip. You just have to be experimentative if you’re not comfortable with “hot flashing” or “replacement BIOS”.

But to avoid further damage to your chip if you’re not sure which are the correct pins to short, measure the potential between the 2 pins by a voltmeter while the system is on. If the voltage reading is zero (or no potential at all), it is safe to short these pins.

But do not short the pins while the system is on. Instead, power down then do the short, then power up while still shorting. And as soon as you hear 3 beeps (1 long, 2 short), remove the short at once so that automatic reflashing from Drive A can proceed without errors (assuming you had autoexec.bat in it).

About how to do the shorting, the tip of a screwdriver would do. But with such minute pins on the PLCC chip, I’m pretty comfortable doing it with the tip of my multi-tester or voltmeter probe. Short the pins at the point where they come out of the chip.

AMIBIOS Recovery bootblock:
  • Copy a known working BIOS image for your board to a floppy and rename it to AMIBOOT.ROM.
  • Insert the floppy in your system’s floppydrive.
  • Power on the system while holding CTRL+Home keys. Release the keys when you hear a beep and/or see the floppy light coming on.
  • Just wait until you hear 4 beeps. When 4 beeps are heard the reprogramming of the System Block BIOS went succesfull, so then you may restart your system.
Some alternative keys that can be used to force BIOS update (only the System Block will be updated so it’s quite safe):

CTRL+Home= restore missing code into system block and clear CMOS when programming went ok. CTRL+Page Up= restore missing code into system block and clear CMOS or DMI when programming went ok. CTRL+Page Down= restore missing code into system block and do not clear CMOS and DMI area when programming went ok Btw: the alternative keys work only with AMIBIOS 7 or higher (so for example an AMI 6.26 BIOS can be only recovered by using CTRL+Home keys).

Boot Block Recovery for FREE

BLACKOUT Flashing
Recovering a Corrupt AMI BIOS chip


With motherboards that use BOOT BLOCK BIOS it is possible to recover a corrupted BIOS because the BOOT BLOCK section of the BIOS, which is responsible for booting the computer remains unmodified. When an AMI BIOS becomes corrupt the system will appear to start, but nothing will appear on the screen, the floppy drive light will come on and the system will access the floppy drive repeatedly. If your motherboard has an ISA slot and you have an old ISA video card lying around, put the ISA video card in your system and connect the monitor. The BOOT BLOCK section of the BIOS only supports ISA video cards, so if you do not have an ISA video card or your motherboard does not have ISA slots, you will have to restore your BIOS blind, with no monitor to show you what’s going on.

AMI has integrated a recovery routine into the BOOT BLOCK of the BIOS, which in the event the BIOS becomes corrupt can be used to restore the BIOS to a working state. The routine is called when the SYSTEM BLOCK of the BIOS is empty. The restore routine will access the floppy drive looking for a BIOS file names AMIBOOT.ROM, this is why the floppy drive light comes on and the drive spins. If the file is found it is loaded into the SYSTEM BLOCK of the BIOS to replace the missing information. To restore your BIOS simply copy a working BIOS file to a floppy diskette and rename it AMIBOOT.ROM, then insert it into the computer while the power is on. The diskette does not need to be bootable or contain a flash utility. After about four minutes the system will beep four times. Remove the floppy diskette from the drive and reboot the computer. The BIOS should now be restored.

Recovering a Corrupt AWARD BIOS:
With AWARD BIOS the process is similar but still a bit different. To recover an AWARD BIOS you will need to create a floppy diskette with a working BIOS file in .BIN format, an AWARD flash utility and an AUTOEXEC.BAT file. AWARD BIOS will not automatically restore the BIOS information to the SYSTEM BLOCK for this reason you will need to add the commands necessary to flash the BIOS in the AUTOEXEC.BAT file. The system will run the AUTOEXE.BAT file, which will in turn flash the BIOS. This is fairly easy. Here are the steps you need to take.
  • Create a bootable floppy diskette
  • Copy the BIOS file and flash utility to the diskette
  • Create an text file with any standard text editor and add the following lines
@ECHO OFF

FLASH763 BIOSFILE.BIN /py

In the above example I am assuming that you are using the FLASH763.EXE flash utility. You will need to replace the FLASH763 with the name of whatever flash utility you are using, and replace the BIOSFILE.BIN with the name of the BIOS file you are using. You will also need to change the ‘/py’ to whatever the command is for your flash utility to automatically program the BIOS without user intervention. If you do not know the command to automatically flash your BIOS type the name of the flash utility with a space and then /? to display the utility’s help screen. The help screen should pecify the command switch to automatically flash your BIOS. If you are using the FLASH763.EXE utility then the switch to automatically flash your BIOS is ‘/py’.
Read More

Thursday, 14 July 2016

// // Leave a Comment

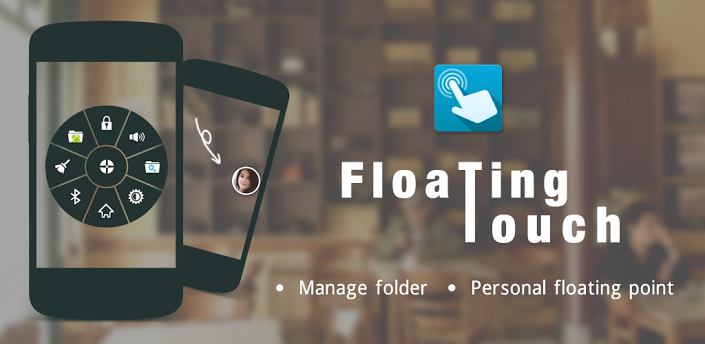
Floating Touch Makes Android Settings and Apps More Accessible.

Things are possible on Android that could never work on iOS. For a user who wants advanced utilities and easy customization, Android is the place to be. Sometimes you can even change the way the phone works just by installing a single app. That's exactly what Floating Touch tries to do. This app borrows from Facebook's Chat Heads messaging feature, but brings other apps and settings to the forefront.


Floating Touch places a small semi-translucent icon on the screen. It will stay on top of all other windows, but you can drag it around and dock it anywhere on the edge of the screen. Give it a quick tap, and the floating panel pops up in the middle of the screen. Moving the point around and opening the panel are buttery smooth with this app.

The floating panel will be pre-populated with navigation buttons, actions, and an array of settings toggles. The toggles are mostly in a secondary panel you get by pressing the settings button in the main view. There are eight buttons around the circumference of the circle, and one in the middle. All these buttons are configurable in the settings.

You can add various actions like locking the screen, turning on the LED as a flashlight, and clearing unused memory. The various Android navigation buttons can also be replicated in Floating Touch, but you need root access for the Menu and Back buttons to work.

Apps on your device can be added to Floating Touch, but the free version only offers so much space. You're limited to the nine standard buttons, plus the secondary panel of settings toggles. If you upgrade to the $2 pro version via an in-app purchase, you can make folders on some of the buttons to hold more app shortcuts.

There is a fair bit of visual customization in even the free version of Floating Touch. You can pick the size and opacity of the touch point, the color of the floating panel, and the style of the point icon. The default is a simple round dot, but there are six other options including a Captain America shield. So that's pretty neat. The pro upgrade includes a custom point that lets you use any image.


Floating Touch is a handy utility, so give it a look. It does plenty for free. 
Read More

Monday, 11 July 2016

// // Leave a Comment

FACTORY RESET IPHONE WITHOUT PASSWORD – ULTIMATE GUIDE

Bygeekyjig on JULY 20, 2015
Everyone has their own Reasons of having password on their phone. Most of the time its about Security Reasons and to avoid unauthorized access but the real problem occurs when you fail to remember or forget your Password. In such situations, only thing that comes in mind is to factory reset the phone so that you can start all over again with new password.


Today we will be discussing and sharing Steps on How to Factory reset iphone without password. So in Case you have forgot your password. Or you just bought an iphone from someone but its password protected. Or  May it be any reason you want to factory reset your iphone and don’t know the password, You are at the right place.

Before we proceed with steps to tackle with this issue, you need to make sure that your phone don’t have iCloud Activation, Because if you have Find my iphone activated then that means when you do reset your phone you won’t be able to login. It will ask you for the Password. Ok so Let us Get started and see how to factory reset your iphone without password.

STEPS TO FACTORY RESET IPHONE WITHOUT PASSWORD

Things you will need to perform this Method are:

  1. iTunes Installed on your PC.
  2. USB Cable

Once you are ready with above mentioned things, we are ready to proceed. This Factory reset without password Method works on all iphones 6/5s/5c/5/4s/4/3gs/iPad or iPod.

Step 1: First of all we will power off the phone. What we will do is keep holding Sleep/wake Button and Slide to Power off.

Step 2: Now you need to start iTunes on your Computer and make sure USB Cable is attached to it. Now Hold Home Button and then insert USB data Cable into your iphone.

Step 3: You will be presented with Connect to iTunes screen on your iphone. Now you can Release the Home Button. iTunes on your Computer should Detect the iphone in Recovery Mode. You could see something like below Picture on your PC.


Step 4: Basically what it says is to reset the Software to Factory standard. So Now go ahead and Click on Restore then Restore and Update. This will delete Everything from your phone so Caution there. Though to Factory Reset iphone without Password you can afford to loose data but will want to have access to your phone again right ?

Step 5: iTunes will extract the software and you can see the progress bar as well. Now just sit back and relax and wait for the software to do all the Process for you.

Step 6: Once extracting completes, You can see Apple logo on the screen it will then begin installing on your phone.

Step 7: Once the phone is restored you can start all over again like how the phone comes out of the box when its new.It is safe now to remove the USB Cable. You will be asked to Select Language, Country/Region, Wifi password and few other things.

You would be now able to Create new Passcode for your iphone without any trouble. So this is how you Factory Reset any iphone without password using iTunes. The method will delete everything from the phone but you will be now able to access it with entering the old password and creating the new one which you can remember easily this time.

Let us know what do you thing about the steps mentioned above and if they are of any help in the comment box below
Read More

Sunday, 10 July 2016

// // 1 comment

How to Tighten Security on Your Android Device

Every day, millions of people all over the world use their smartphones, but many people don’t realize that these phones are not completely secure. If you own an Android smartphone, you need to take steps to protect yourself from fraud and identity theft. You can lose a whole lot more than just contact information and other day-to-day information! Someone could end up getting your financial information, and then you would really be in a mess. Also, you can lose the things that mean a lot to you, including photos, social media accounts, documents, emails, and more, or even worse, your information could be shared online for the rest of the world to see. With these things in mind, here are some things you can do to tighten the security on your Android device.
Encrypt Your Data
Encrypting data is like securing your data with a secret code that only you know. Using encryption helps to increase your security, and you can open encrypt while using any type of smartphone setting. You will need to have a password to access any of your data.

Lock all Apps
You need to lock all of your apps. This is particularly important for apps that contain personal information that you don’t want anyone else to see. Investigate the range of app locking apps, or search within individual apps and disable any options that allow simple and easy access – unless you’re certain that you don’t mind anyone else having access!

Use Built-In Security
There are all kinds of screen locks available, from passwords to pins to patterns to face unlock. Make sure that you are using at least of the screen locks that can be found in your Android settings. Be sure to make it so your passwords are not easy to guess, even with this security.

Choose the Best VPN Service
It is important to use the right VPN for your Android device, but there are so many out there that it can be difficult to know which one is the best for your particular needs. Do your research before you buy, and be sure to consider all the options carefully.

Don’t Save All Passwords
A lot of people save all of their passwords to sites and online services they use. But, if you do this, and someone were to get your device, they will have access to all of your passwords. Do not save them in your Android device, in particular, banking and payment apps.

Create Multiple User Accounts
If you share your device with others (spouse, children, etc.), it is important that each user has their own accounts in order to protect your privacy. If you’ve a reasonably new tablet you can create guest accounts for other users – just like on your desktop computer.

Install Antivirus Software
There is antivirus software available for Android devices, and we strongly suggest that you install one. Smartphones are basically hand-held computers, and they are as subject to viruses as any other computer.

Watch for Safe Apps Download
Loads of software and applications are available for Android devices, and you could end up unwittingly downloading harmful applications. For this reason, you need to pay attention to the smart phone agency terms and application before downloading anything. Also, you can set your antivirus to check every app that installs.

Avoid Financial Transactions
Never do any type of financial transactions on your smartphone or tablet. If you must do online financial transactions, be sure to use a private home computer that is password protected. If you can get a dedicated Internet line to your home, that is even better, because there is no chance that others in the neighborhood can use your service and possibly access your information.
Read More

Tuesday, 5 July 2016

// // Leave a Comment

Easy way to Control Your Android Device from Your Computer/Laptop

Learn How to Control Your Android Device from Your PC: here we will get to know how to Remotely Control your Android from PC. We will be using AirDroid that helps you to remotely manage your android from PC. You can easily transfer files, exchange messages and can access apps using AirDroid. Go through the post to know about it.
In this post, we will describe how to control your android device from PC. Yes, it’s possible you can access your android device from PC. This will help you to manage your android device when it is not available with you and the excellent thing is you can transfer files from PC to android through the wireless network. There are numerous apps available on the internet that allows you to share and transfer files wirelessly, but AirDroid is one of the reliable out there that  will make you remotely manage to your Android from a Web browser.

How to Control Your Android Device from Your PC

AirDroid allows you to access and manage your Android phone or tablet from Windows, Mac or the Web, wirelessly, for free.

Advantages and Features of AirDroid :-

  • You can also directly talk from PC.
  • Send and Receive SMS from PC.
  • Transfer apps,images,videos,files from PC to mobile through the wireless network.
  • Install/Uninstall apps easily and also take the complete backup of your device.
  • Trace your device when you lost it and much more features available in AirDroid.

How to Use AirDroid

Step 1. Download AirDroid on your android device and install it.
Step 2. You will be asked to Sign in or Sign Up, But if you are having an active wifi connection then simply choose the option of “Configure Wi-fi Network”
Step 3. Now select Wifi Settings and connect your Default Wifi Network and go back to the home screen.
Step 4. Now from PC browser go to web.airdroid.com and you will see a QR Code there.
Step 5. Now simply open Airdroid app from your android and scan the QR Code Given on your Computer screen.
Step 6. Now you have successfully connected your android device to PC. You can upload files by clicking “files” on the desktop, you can chat from your PC and can have full access to your android device.

So, above is the method of controlling your Android device from your PC. You can easily use the above-mentioned process to remotely control your android device. Moreover, you can exchange SMS and transfer files too. Hope you like the post! Share it with your friends too. Leave a comment below if you are facing any problem at any step.
Read More
// // Leave a Comment

How To Enable WhatsApp Chat Heads In Your Android Without Root.

As we all know that the WhatsApp is having many features and many applications came in the market such as Hike, Telegram and other applications but people loves WhatsApp. If you will check that hike is having many features such as Stickers, Group limit is high and many other amazing features but people like WhatsApp because it is platform independent. It works in any platform such as Blackberry, iPhone, Nokia, Android. So in todays article we are going to show you how can you enable Chat heads in your device just same as Facebook messenger
Enabling the chat heads from Dashdow comes up with many amazing features such as this app wont show your last seen to your friends and you can read the messages of your friends without opening WhatsApp isn’t it quite good? But at the same time this application is having some of its disadvantages too that we will be discussing down

WhatsApp chat Heads
You would have seen Facebook messenger. There are chat heads in the application and you can check the messages. This application is available on play store and you don’t need rooted device and without opening WhatsApp you can easily check who have messaged you. Make your WhatsApp like Facebook messenger.

Benefits:

  1. No need of rooted mobile phone
  2. Read WhatsApp message without opening WhatsApp Messenger
  3. Hide your last seen, Blue ticks, and online status
  4. Check messages directly from lock screen without unlocking your device

Disadvantages:

  1. You can only read the messages you can’t reply the messages
  2. For replying the message you need to open the application
  3. You need 4.0+ Android device it is not supported in lower device

This were some advantages of the application so lets see how to enable the WhatsApp chat heads

How To Enable WhatsApp Chat Heads In Your Android Without Root
Step 1: Install the Dashdow application from here – Play Store
Step 2: Open the application and allow the app Notification Access
Step 3: Now allow the application permission given in below screenshot
Step 4: Now you will see Access Success and now just click on OK
Step 5: Whenever you will receive message on WhatsApp cheat heads will appear
This was the application from which you can easily enable chat heads so keep visiting for more Tips & Tricks.
Read More

Monday, 4 July 2016

// // Leave a Comment

How to Track Lost Android Phone and Tablet With Minutes.

Your Android gadgets are the most important things in your life. It contains all your important contacts and information. If you lose your equipment, you will be losing all those sweet memories with the photos and video. But there is some good news to android phone/tablet users, you can now easily find or at least know where your missing phone is with or without using android application.
Let’s first look at the way of finding your lost phone which doesn’t contain any app installed on it.
Use the IMEI Number

Every android phone carries a unique IMEI number (International Mobile Equipment Identity Number). It will be printed at the back of your device. If you are unable to find the number, you have to launch your phone app and dial the number *#06#. This will give you the IMEI number of your phone. Store this number in a safe place so that it helps you in locating your phone when it is lost.

When you file a complaint, this number has to be added in the report. Your service provider uses this number to track your phone and tell you where it is. No matter if the person using the phone is using a different SIM card or has switched off the phone. Once the device is traced, you can request your service provider to block it from using.

This is one of the easy ways of locating your lost Android phone or tablet.

Plan B

Another way of tracking your lost Android gadget in no time is through Plan B app. This app does not require you to install any recovery software previously but still helps in finding your lost phone. All you need to do is log on to your Google play account. Lookout mobile security offers free software called Plan B. Download the software from play store to your phone. This will be possible only if your phone is within the Internet coverage area. Wait for some time and then send the keyword “locate” without the quotes through SMS to your phone. And a map showing where your equipment is will be sent to your Gmail account. This app is very much useful in situations where you don’t have IMEI number.

If you have installed and configured any of these below android software previously, there is good chance of finding it.

You can log on to Google Play store > My Android Apps, on your computer and check if you have installed any of the following apps previously.

Lookout Security and Antivirus

Lookout is the best android app for security and antivirus. So far, it has received millions of downloads. Just recall if you have installed this on your phone.

If you have activated the option “Missing Device” in this app, it is easy to find your device. If you have also enabled “Signal Flare” option, you can trace the last known location of your android device. This is helpful in case your phone battery is dead or tablet is switched off.

Now sign in Lookout to locate your device. The map shows the location of your phone. If you are at a short distance from the tablet, you can choose Scream option to make a loud noise to find it.

Android Device Manager

Google has recently released a new locator feature for Android gadgets called Android Device manager, which helps its users locate their lost or stolen phones and tablets. It functions in the same way as Lookout and Samsung’s “Find My Mobile”. Here’s how to use Android Device Manager.

Go to the Google Settings app, then select Android device manager. By default the locator feature is activated but to activate remove data wipe, select the box next to “Allow remote factory reset”, then select “activate”.

To use this feature, open the site https://www.google.com/android/devicemanager and sign in to your Google account. You may be prompted for permission to allow Android Device Manager to use location data. Select the Accept tab to continue.

Now you will be provided with a map that shows the location of your device along with other details such as the name of the place, when it was last used and more. The location data doesn’t help you if your phone is misplaced somewhere in your home. Instead of making a call to your phone using other’s phone, you can call your phone directly from Android Device Manager. This will make your device to ring with high volume for 5 minutes, even if it’s in silent or vibrate mode.

One feature that is missing in Android Device Manager is remote locking, which can be useful in preventing a stranger from accessing your data, while you’re tracking its location.

Apart from these, there are other apps such as Android Lost, Where do My Droid and GadgetTrak that help you in finding your lost Android phone/Tablet.
Read More

Saturday, 6 February 2016

// // Leave a Comment

Nokia Mobile Tricks


Even though now Microsoft had buyed nokia there are some of the tricks that helps you break the security wall.Some of the intresting tricks that you must know about your nokia device.Some of these codes may help you unlock hidden functionalities that you've never seen.

Now a days android users have become more and more and people almost forgot nokia after it was taken up by Microsoft.These codes may work in any of the latest nokia lumia version to Nokia 230 old model devices

These helps to know the details of your device,it also helps to know IMEI number of your device.

Download entire Nokia Trick.PDF file here
Read More

Monday, 13 April 2015

// // Leave a Comment

why the linux is most secure that other OS.

Is the Linux is more secure than the other Operating Systems,and why do most of the companies prefer Linux because Linux is one of the most powerful operating system and it is one of the mostly used operating system across the world.It has awesome and amazing features.Due to its performance its getting more popularity around the world.

Linus is a FREE Open source Operating System which was released long back in 1991 with awesome in-built features.Most of the companies and people choose Linux because it is more Secured and Fastest Operating system compared to the other operating systems.coming to the point lets see the top four main reasons why Linux is Best and why are all others recommends Linux as the Best Operating System.

1.Linux is a free Open Source:-
Linux offers their OS totally free for all its users around the world.and every one loves the free stuff such as free tools and programs etc.Most of the companies or people not been able to pay price of licence legally.Linux can be downloadable freely from its official site and can be installed easily in any computer just by seeing some tutorials around the Internet.and then starts using Secure and free OS.It will be the better idea if you choose a Linux

2.Linux is Lightweight:-
why i called Linux as a Lightweight because it consumes less resources.Linux is a lightweight OS combined with a lot of lightweight alternatives for desktop environment such as LXDE programs then it will take a fewer resources comparing to the other type of operating systems like Window and IOS.The best example is Raspberry which might be easier for you to understand.

3.Linux Independent of Hardware:-
 The another awesome feature of Linux is that it is Portable that means it can be installed in any Hardware.If you Love to have a better performance then choose X86 based processor and you can even run it on ARM based processor.Linux can be installed in any Hardware and in any different CPU and it makes the user to satisfy with its features.

4.Linux is Flexible:-
Why a Linux is called as a Flexible OS because it has a free open source license with that we can do any kind of Operation and nothing can stop us to do any thing.The Desktop environment of Linux having a lot of Amazing features and effects we can easily sort our favorite softwares and programs and we can easily add/remove the softwares.

NOTE: well these are the four main features which makes every one to choose Linux.if you any queries or suggestions regarding this article fell free to ask in comment field.   
Read More

Thursday, 9 April 2015

// // Leave a Comment

Top eight apps to Increase your Android's Performance


Android isn't as controlled and directed as its iOS rival. Regardless of what adaptation of the OS you're running, its fundamentally a tinkerer's fantasy. It permits Users to change and advance the framework's execution from beginning to end. From reserve cleaner to garbage record seekers, CPU overclocking apparatuses and application disablers, here are eight Android app that you can use to get all the more out of your system

1. Clean Master (Free)

Cheetah Mobile's Clean Master accompanies a Junk Files instrument for cleaning your mobiles application and systems reserve and in addition temp records. It additionally saving a memory sparing Phone Boost device, an application administrator and antivirus apparatus. While you can likely skirt the undertaking executioner like highlights of Phone Boost, the Junk File apparatus is awesome at cleaning out widowed and provisional records, and also cleaning out your framework reserve to free up mobile stockpiling. The application administrator permits clients to reinforcement APKs, move applications to the SD card and uninstall applications. An astonishing solid point is Clean Master's antivirus device, which scored profoundly in AV-TEST's most recent portable antivirus overview.

2.DU Speed Booster (Free)

Another similar in with no reservations one Android advancement apparatus is DU Speed Booster, which accompanies a Trash Cleaner for application reserve and garbage document cleaning, an one-touch quickening agent, application director, antivirus, a protection counselor and implicit web pace test. Once more, the profits of errand murdering with quickening agents are questionable, DU Speed Booster's garbage record/ store cleaner is an awesome approach to free up inner storage room, and the application director and different apparatuses are likewise strong additional items.

3. SD Maid (Free)

SD Maid is a stockpiling support application intended to free up space on your SD Card or interior stockpiling via looking for widowed records and envelopes deserted by uninstalled applications. Likewise, it additionally serves as a record director. The application is an incredible approach to clean up some commute space, and is additionally awesome for occasional framework support. The free form is a flawlessly serviceable application, however more choices can be opened by obtaining an open key.

4. CCleaner (Free)

Piriform's CCleaner is one of the best PC support instruments for Windows machines, and now, its likewise run portable with an Android application that is the ideal device to bail you clean the poo out of your framework. Like its desktop kin, CCleaner for Android is a multipurpose cleaning device that can clean out your application reserve, download organizers, program history, and other brief records, and also alternatively clean your call and SMS log specifically or in mass. Notwithstanding its quick, commercial free cleaning background, CCleaner likewise accompanies an application chief, CPU, RAM and capacity meters, and also battery and temperature instruments.

5. CPU Tuner (requires root) (Free)

CPU Tuner permits you to screen and change your CPU's execution. Tweak the settings for your CPU senator, underclock to spare battery, overclock to enhance execution, and set different trigger-based execution profiles to guarantee your CPU performs simply the way you need. Once more, a little care and research in respect to what your equipment can endure is essential, particularly in the event that you decide to overclock. Likewise, not at all like comparable applications (SetCPU, for instance), CPU Tuner is free on the Google Play market.

6.3c Toolbox / Android Tuner (requires root) (Free)


3c Toolbox, in the past known as Android Tuner, furnishes clients with a huge amount of symptomatic and tweaking devices that a clever client can use to diagnose and enhance the strength of their framework. The tool stash incorporates an undertaking supervisor to oversee (or execute) your applications, reinforcement or restore APKs, CPU representative and voltage changes, framework settings, for example, SD reserve size or simply see an abundance of demonstrative information. Similarly as with any application that tinkers with framework settings, be watchful of what you tinker with and do your exploration before evolving anything.

7. BetterBatteryStats ($2.89) (requires root)

While the Android settings menu furnishes clients with some knowledge on battery status and the amount of vitality is being used, actually situated clients can get much more exhaustive data with applications like BetterBatteryStats. Furthermore, BBS has great apparatuses for following applications that do "incomplete wakelocks" that keep the gadget from entering battery-sparing slumber mode. On the off chance that you associate that some with your applications are biting through your battery life or are keeping your telephone from legitimately entering slumber mode, BBS can be an awesome device to offer assistance.


8. Greenify (requires root) (Free)

Greenify fundamentally puts an application in a condition of hibernation, not able to get to framework assets, transfer speed or run foundation forms. Nonetheless, Greenify permits you to run an application regularly in the frontal area when unequivocally called by the client with no additional object. On the off chance that you've got memory or battery hoards that continue depleting assets out of sight, don't trouble with an assignment executioner when you can just greenify it. Simply don't do that to your wake up timer or ambassador, unless you need them to quit working.
Read More

Wednesday, 8 April 2015

// // Leave a Comment

Top Android Phones in India @ 2015

Android Phones have gotten an impressive share in the Indian Mobile Market are as yet numbering. Indian business sector is presently overflowed with cheap android cell phones like Micromax, Spice and numerous others. Striving for a decent brand with great highlights is dependably a smart thought despite the fact that the expense is minimal high as it will advance your Android experience. As of late, with the overflowed Android tablets in India, Android phones are getting much less expensive because of the opposition.

LG Google Nexus 5
The Nexus 5 is a Smartphone made by LG with Google poweing the OS. The gadget accompanies a 4.95 inch full HD show and is fueled by a 2.3 GHz Qualcomm Snapdragon 800 Processor + 2GB RAM. Inside, you'll discover up to 32GB of capacity. It is a solitary SIM bolstered versatile and accompanies Corning Gorilla Glass 3 assurance.

On the back is a 8MP cam while you can discover a 1.3MP cam on the front end. There is a 2300 mAh battery implanted, which surrenders you to 17 hours of talktime. Counting the battery, the Nexus 5 measures 130gms.

The cost of Google Nexus 5 in India is around Rs.24,395

Sony Xperia Z
Sony Xperia Z accompanies a 5″ TFT capacitive touchscreen, JellyBean OS, quad-center 1.5 GHz CPU, 2GB RAM & 16GB interior memory. NFC capacities, 13.1MP lit up sensor for incredible picture quality & 2.2MP on the front side.

The cost of Xperia Z in India is around Rs.27,48

Samsung Galaxy S4
The most recent Smartphone in the Samsung's Galaxy arrangement is the S4 adaptation. A 5" Super AMOLED capacitive touchscreen with corning Gorilla glass 3 security and multitouch support. Runs on Android OS v4.2.2 and is upgradable to v4.3. The gadget is controlled by a 1.6GHz quad-center Cortex A15 and quad-center 1.2 GHz cortex A7 processors. It comes in 16, 32 and 64GB (interior stockpiling) variations and backings microSD card up to 64GB. The versatile likewise has 2GB RAM that makes the applications run smoother.

Going to the cam details, the Galaxy S4 has got a 13MP back cam with self-adjust and LED glimmer while the front cam is a 2MP one. One can shoot upto 1080p HD features @ 30fps. The network alternatives incorporate WiFi, Wi-Fi hotspot, GPRS, Bluetooth v4. 0, NFC, Infrared, microUSB v2.0 and GPS.

The cost of Samsung Galaxy S4 is around Rs.17,999;
 Lenovo Vibe X2
This is one the best 4G empowered Smartphones in India. The Vibe X2 sports a 5 inch full HD show with Gorilla Glass insurance. It is a double SIM versatile. The handset is controlled by a 2 GHz Octa Core processor and 2GB RAM. There is a 32GB of inside capacity in the gadget. The 13MP cam on the back side gives you a chance to take dazzling pictures, while the 5MP front confronting cam is ideal for selfies. There is a 2300 mAh Li-Polymer battery inside the gadget which keeps going up to 19 hours on 3G.

The cost of the Lenovo Vibe X2 in India is around Rs.19,999

Xiaomi Mi4
This single SIM Android phone from Xiaomi is presently the most sizzling offering versatile in India. The Mi4 sports a 5 inch full HD show and is controlled by a 2.5 GHz Quad center processor + 3GB RAM. The gadget is accessible in 16GB and 64GB variations. There is a 13MP cam on the back and 8MP cam on the front side. The 3080 mAh battery issues you adequate battery reinforcement without a doubt.

The cost of Mi4 in India is around Rs.19,999 (16GB rendition) & Rs.23,999 (64GB adaptation);

Huawei Honor 6
The Honor 6 sports a 5inch crawl 1080p presentation with Gorilla Glass 3 assurance. It is fueled by a 1.7 GHz Octa center processor alongside 3GB of RAM. It accompanies 13MP essential cam and 5MP front cam. There is an inside memory of 16GB, which can be extended up to 64GB by means of microSD card. The 3000 mAh battery gives a dependable life.

The cost of Honor 6 in India is around Rs.17,999

Moto G (2nd Gen)
This is another gadget which is fueled by Google. The Moto G brandishes a 5 inch HD screen with Gorilla Glass and is fueled by a 1.2GHz quad center processor alongside 1GB RAM. It bolsters double SIM cards (GSM + GSM). Inside the gadget, you'll get a stockpiling of 16GB, which can be extended up to 32GB. At the back, you'll discover a 8MP cam, while on the front there is a 2MP cam. The handset is outfitted with a 2070 mAh battery.

The cost of Moto G (second Gen) in India is around Rs.12,999

Samsung Galaxy S4 Mini
The Samsung Galaxy S4 Mini is a littler variant of the Galaxy S4 and it has got a double SIM support. The gadget accompanies a 4.3" Super AMOLED touchscreen with a determination of 960X540 pixels. It emphasizes the Android 4.2.2 Jelly Bean OS and is fueled by a Dual-center 1.7 GHz processor + 1.5GB RAM. The Galaxy S4 Mini has got a 8 MP back cam with LED blaze and self-adjust while there is likewise a 1.9 MP front shooter. It has got 8GB of inward stockpiling. You can however utilize a 64GB microSD card to expand the memory. The gadget accompanies 1900 mAh battery.

The cost of the Galaxy S4 Mini is around INR 15,100

Asus Zenfone 5
This 5 inch touchscreen gadget from ASUS accompanies Gorilla Glass 3 security and is controlled by Intel Atom processor alongside 2GB RAM. On the capacity front, you'll get a 16GB interior memory and 64GB expandable backing. There is a 8MP essential cam and 2MP auxiliary cam for taking good pictures. The 2110 mAh battery surrenders you to 18 hours talktime. The handset underpins two SIM cards.

The Zenfone 5 is evaluated at around Rs.9,999 (16GB) & Rs.9,499 (8GB) & Rs.7,999 (lite variant)

Redmi Note 4G
It is yet another 4G Android portable with great particulars in India. The Note dons a 5.5 inch touchscreen and backings single SIM card. The handset is fueled by a 1.6GHz quad center processor and 2GB RAM. Inside, you'll get 8GB of capacity and you can grow it up to 64GB. It dons a 13MP essential cam and 5MP selfie cam. The 3100 mAh battery can keep going for up to 35 hours of moderate utilization.

The cost of Redmi Note in India is around Rs.9,999;

Micromax Yureka
This is one of the best 4G upheld mobiles under 10,000 value extend in India. It wears a 5.5 inch show with Corning Gorilla glass 3 assurance. The handset is controlled by a 1.5GHz octa center processor alongside 2GB of RAM. The Cyanogen OS is an extra fascination of this gadget. It returns with a 13MP cam and 5MP front cam. Inward capacity is 16GB and you can extend it up to 32GB. The 2500 mAh battery will effortlessly issue you 10 hours of reinforcement on overwhelming utilization.

The cost of Yureka in India is around Rs.8,999;

Lenovo A6000
At this time, the A6000 is the most reasonable 4G cell phone in India. This double SIM handset brandishes a 5 inch multi-touch show and is controlled by a 1.2 GHz Quad Core processor alongside 1GB of RAM. Inside capacity is 8GB and you can extend it upto 8GB by means of microSD card. On the back is a 8MP cam with blaze and self-adjust, while there is a 2MP front cam for selfies. The 2300 mAh battery issues you a good reinforcement. You can encounter immersive sound with the Dolby Digital twin speakers on the back.

The cost of A6000 in India is around Rs.6,999

I've recorded just the smash hit Android cellular phones in India. Thus, pick one among the above android phones that suits your day by day needs and plan. Do lemme know your most loved portable through your remarks.

Note: The costs may differ. It would be ideal if you check with your nearby versatile outlet at precise costs before striving for the buy.
Read More

Tuesday, 7 April 2015

// // Leave a Comment

How to safe guard your Android Mobiles from thiefs


There is probably cell phones are truly valuable devices however it can't be denied that they can likewise make an enormous enticement for cheats. A thief can attempt to run off with your smartphone or simply get hold of your information and private data through pernicious programming(Malware). Consequently, to maintain a strategic distance from this, one needs to guarantee that the device and information is kept secure with various alternatives accessible because of the dynamic innovation. Here are the most ideal ways you can keep your Android phones sheltered and secure from everything:

Don't Check Time on the Device in Public: it has gotten to be exceptionally normal of us to depend on our mobiles and devices to check time as opposed to wearing a watch. On the other hand, that could be truly hazardous on the off chance that you do it out in the open. These days it is basic for cheats to first ask you what time it is and afterward when you take out your smartphone to check and tell, they would draw near to you, grab your phone and simply flee away. In this manner, it is key that you do wear your watch and never take out a mobile to check time on a solicitation in broad daylight.

Utilization Pin Code or other Pattern Lock is Necessary : A considerable measure of new cell phones are thinking of shockingly better choices for security for instance Face open which will permit you to utilize the picture of your face and afterward open your mobile! This adds a considerable measure to the security of your mobile. On the other hand, if your mobile does not emphasize as cutting edge as this security alternative then you should dependably have a pin code setting. Utilize this setting and make a pin code which will guarantee that no one with the exception of you will have the capacity to get to your mobile and data.

Empower(enable) Device Administrators: A percentage of the applications in your Android device will give you a chance to set mobile administrators. This issues them extraordinary powers and makes it hard to uninstall them. You can utilize these to verify that your security applications are given these forces so that on the off chance that you happen to lose your mobile, it will be easy to locate it and get it back. Be that as it may, be cautious with the applications as well. Don't give this power to the applications which will have broadened highlights and would some way or another get into your own data without your knowing.

Use trackers and locators: there are a considerable measure of uses now that are outlined particularly to keep your Android phone safe. These extent from distinctive sorts of locators to trackers. You can download the best one effortlessly and install it. At whatever point you lose your mobile you will have the capacity to find it through GPS or locator with your PC. A few applications likewise permit you to control your information on your lost mobile from your PC. On the off chance that you are not ready to recover your mobile, you can have an application which will essentially erase the whole information if the password entered is inaccurate. There are a considerable measure of alternatives to investigate.


Utilize this References: 
Track your stolen Android device:- Prey-Project
Track your Android Device :- Android Device Manager
Where is my Droid App:- Where is my Droid
Read More
// // Leave a Comment

How to Disable the what's app blue ticks

Here's the procedure by which you can disable the blue marked read option on your WhatsApp's Android application:

1. Verify that your cell phone is running on Android 2.1 or a fresher Version if not follow the 2nd,3rd and 4th steps

2. Go to settings menu and empower(enable) 'Download from Unknown Sources' in the Security tab

3. Go to the WhatsApp site and download the APK (application) app accessible under www.whatsapp.com/Android/

4. Once the APK file is downloaded to your phone memory, tap the "Install" option.

5. after installing the latest version from whats app official site open whatsapp> select Settings > Account > Privacy. Under the Privacy tab, uncheck the Read Receipts choice.


NOTE:This option doesn't apply to group messages and allows the other participants know when you've read a message. Also, once you disable this feature, you won't be able to view blue double-check marks when you send a message as well. 

Read More

Monday, 6 April 2015

// // Leave a Comment

7 Quick Tips To Extend Battery Life on Android 4.4 Kitkat


Today, we will drive you through some valuable, best and fast tips to augment battery life on Android 4.4 KitKat running Smartphones. Notwithstanding, all the tips are followed by CNET for delaying battery life. All in all, would you say you are prepared to crush your gadget battery without limitations and continue going all the day without getting it charged? At that point, take after underneath helpful and fast tips to amplify battery life on Android 4.4 KitKat. Here we begin… 

Best Tips To Extend Battery Life on Android 4.4 KitKat

Exploit Inbuilt Battery Monitoring Tool :
Since from the Android 4.3 Jelly Bean rendition, Google has given an inbuilt "Battery Monitoring Tool". It gives complete data about battery like Remaining battery rate , Phone running time, forms/applications and measure of battery ate by them.

Presently, on the off chance that you have officially left any application's regardless it running out of sight and you need to stop it for all time then utilize this battery observing device. There are two approaches to get to Battery Monitoring Tool


1. Explore to Notification segment > Tap on Quick Settings > Tap on Battery Logo > You are in.

2. Go to Settings > Tap on Battery > You are in.

Presently, from that point, click on any application which you need to stop > Tap on Force Stop catch to close it down!

Concentrate on New GPS Feature

GPS is basic now-a-days. In the wake of introducing various applications on your gadget; presumably, you don't even know which applications are utilizing GPS benefit pointlessly and expends battery. Essentially, to stop GPS administration, we basically incapacitate it. Be that as it may in new Android 4.4 KitKat variant, new GPS modes are included so you can choose any of them relying upon your inclination

For access GPS highlight, go to Settings > Tap on Location > Tap on Mode > Go with your choice.

Stop Automatic Syn

On the off chance that you sign-in with your any gmail account on your gadget then naturally it synchronize all your gadget information to it like "Application Data, Calender, Contacts, Google Currents, Photos, Google+ Auto Backup, and so forth.", which isn't vital. Furthermore, on the off chance that you have numerous records then you're gone, the battery will deplete significantly more speedier.

It's prudent to adjust just that information which you have to, particularly contacts and gmail. To change the sync alternatives, explore to Settings > Accounts – Google > your current email address > uncheck the choices which you need to impair.

Disable Google Now's Auto-Voice Detection

Definitely! Google Now will be currently bolstered on Android 4.4 KitKat immaculately. You can enact it just by saying "alright, Google", which gives an amazing background of utilizing Smartphones without hand

In the event that you are utilizing this administration then well and great, however for others its similar to a battery eating beast. To handicap it,  take after the underneath steps!

Open Google Now > go to Settings > Tap on Voice > impair Hotword location.

Impeccable Battery Charging

To get the puniest impact from your gadget battery, you must take after one principle says,

"Energize your battery to 100% just and after that, restart your Smartphone once to discharge all the assets back to the Android OS; Whereas, don't plug your gadget for charging until it indicates battery low message."

In the event that you take after this principle, then your battery life will be longer without a doubt! Attempt it out and see the distinction.

Use Battery Saver Apps

Clear your confusion that "Battery Saver Apps" makes your battery dry; really, it spares your battery by shutting foundation running applications and by recommending vital changes. To look at it, introduce any of the Batter Saver application on our gadget for one day and one day without it. Without anyone else's input no one but, you can confirm the battery status, who positions better?

Here is the rundown of 5 Best Android Battery Saver Apps that will truly help you to broaden battery life on Android 4.4 Kitkat.

Some Extra Tips

Kill your Wi-Fi and Bluetooth Connection, when not in utilized.

Try for a typical Wallpapers, as opposed to putting Live Wallpapers.

Debilitate haptic input.

Put just required gadgets on landing page which don't oblige versatile information association, particularly stay far from climate gadgets.

That is it, gentlemen! I know to deal with all things is truly intense assignment, yet in the event that you need to broaden battery life on Android 4.4 Kitkat and need to continue running all the day with your gadget then you need to tail it without a doubt.

Your Views on Tips To Extend Battery Life on Android 4.4 Kitkat

What, I have missed some vital tips? At that point, we might want to hear it from you. For any sort of criticism, utilize the underneath remarks segment! Appreciate and bear in mind to impart to others :D
Read More